8/28/09

Breakfast on the grill

If there's one thing I learned to love more than anything in England, it's the breakfast sarnie. I use the general term, breakfast, because there are many different combinations a breakfast sandwich can consist of. After a Saturday night at the pub, Sunday mornings call for either a sausage or bacon sarnie. Egg is a great addition if you're feeling extremely hungover.

When it comes to sausages, England rules. If you're thinking of a time where you visited and ate one of those disgusting, mealy sausages served at bed and breakfasts throughout the UK as part of a full English breakfast, then think again. My local butcher, Frank Godfrey, in Highbury, had the most delicious house-made pork sausages with a little Director's bitter added in the mix.

I spent a cold Christmas Eve morning at Godfrey's, in a queue that ran around the corner, waiting for my gorgeous free range turkey. A little girl in a butcher's apron came out with a tray of coffee, mince pies and sausages on toothpicks to cement one of my favorite Christmas memories.

Here in Chicago, I go to Paulina meat market, which is a German market and smokehouse. The place is always packed, the men behind the counter are friendly and willing to order anything for you, and their array of sausages is fantastic.

Bacon is a different story. I have a serious weakness for Canadian bacon, also known as streaky bacon in the UK. One of my Mom's favorite breakfasts was to make a pile of crispy bacon and then crush them between toasted rye bread. The traditional English bacon is back bacon- thicker with a thin rind of fat running down one side.

To top it off, there is the sauce debate. I personally cannot live without HP sauce; a thick, tangy brown sauce that goes perfect with sausage or bacon. My husband is more of a "Tommy K" man (tomato ketchup). I like to add a dollop of hot Colman's mustard to the side of my plate to dip the sandwich in as I eat... only a little is needed.

Let's be honest, this isn't much of a recipe, but if done right, it's one of the best breakfasts you'll ever have. You might want to spend some time thinking of the ideal bread to use. Warburtons white bread is ideal, if you're in Northern England, but I like multigrain.

We've started grilling both the sausages or bacon and the bread on the grill. I also like to use chicken sausages as a change- ones with chillies spiked through the middle with herbs.


Sausage Sarnie
Serves 2

4 sausages of your choice
4 slices of multigrain bread
butter
HP sauce or Tomato ketchup

Heat a grill pan or the barbecue grill to medium high. Cook your sausages until the juices run clear. Chicken sausages are normally already cooked through, so they'll not take as long as pork sausages.

Take your slices of multigrain bread and pop them on the grill- about a minute on each side, checking to make sure they're not burning, but that there are some nice grill marks across the toast.

Slices your sausages on the diagonal (at this point, my dog, Indy, is staring up at me with a longing look).

Slather the toast with some butter (real butter please) and lay your sausages across one side of the toast. Top with your choice of sauce and squish the top layer of toast down. Cut in half and enjoy.

8/23/09

Sense of panic

I'm starting to feel a sense of panic as the month of August begins to slip away. I'm certainly not ready to let summer go. There are so many good things to eat at the moment, so I am frantically cooking with as much of summer's best as possible. I've served slices of seedless watermelon for dessert on several occasions over the last few weeks. When it's sweltering, there's nothing more refreshing.

If you grow up in Indiana like I did, you can't escape corn. It's in the fields that surround you, relentlessly reaching to the horizon in every direction, outside of every town. As the catchphrase of a local amusement park says, "there's more than corn in Indiana." Having grown up there, I'm not entirely convinced you need anything else other than the best corn on earth. There are certainly many good things in Indiana. I love the hills of Bloomington in southern Indiana, where I went to Indiana University. I love the inland lakes, the woods near where I grew up and covered bridges over cool streams.

After having lunch this week with my childhood friend, Rachel, who spent a summer de-tasseling corn, I realize that there are some people who spent too much time in the fields to continue the love affair. She admitted that she only just recently started eating corn again after refusing the sweet stuff for many years.

I have a deep rooted craving for the pure white ears of sweet corn that comes from spending too much time away from home- too much time out of the country. If you've never tried the snowy, all white cobs of corn, try to get your hands on some. I won't refuse the yellow and white mixed, but these seem to be the sweetest and juiciest variety.


My Dad brought this corn and a box of ripe red tomatoes to Chicago from their local farm stand last week. We boiled the ears in salted water for 7 minutes and tested the kernels with a sharp knife to ensure it's tender and ready to serve. The tomatoes were ruby red and juicy ripe, not like the disappointing tomatoes we buy in the supermarkets today. I've been eating them with every meal and will be sad to see the last of them go.

In my opinion, there's no better way to enjoy corn than straight from the cob with lots of butter, salt and pepper. Everyone in my family has corn contraptions for the table- corn holders that have spikes on the end to make the crunching easier, butter dispensers, even corn plates. My Dad likes to take any leftover cobs (which is rare), shave the kernels into a nice big pile and then fry them in butter and season well.

In the event that you have more corn than you know what to do with, I can personally attest to the love people have for the Corn and Tomato Scramble I made on the 4th of July and I've made it several times over the summer.

Here's another idea from the latest issue of Gourmet magazine. It's a great version of creamed corn and is perfect with barbecued chicken.


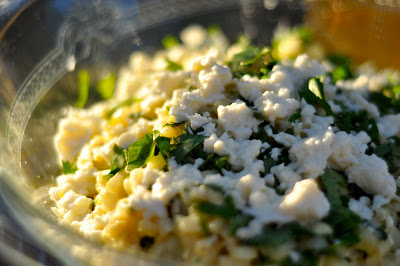
Cheesy Creamed Corn with Cilantro
Adapted from Gourmet Magazine
Serves 4

6 ears of corn, kernels cut from the cobs
2 tbsp unsalted butter
3 scallions, finely chopped
1/2 cup heavy cream
1 tsp cornstarch
1 large garlic clove
handful of crumbled queso fresco or mild feta
handful of chopped cilantro

Melt the butter in a heavy skillet over medium high heat. Cook the scallions until softened, about 5 minutes. Add the corn and 1/2 tsp of salt and pepper. Cook for another 5 minutes, stirring regularly.

Stir together the cream and cornstarch in a small bowl until combined. Add to the corn and simmer, stirring until thickened, about 3 minutes. Transfer 1 cup of corn mixture to blender or food processor with garlic and puree until smooth. Return to the skillet and cook, stirring constantly until heated through.

Serve with cheese sprinkled on top and cilantro to garnish.
________________________

The sauce below is adapted from the same Gourmet article in the latest September issue. The Chipotle sauce can be compared to a barbecue sauce with a kick. I then altered the cooking method by flattening the chicken (taking out the spine and breastbone and quartering it) and then barbecuing it over indirect heat.

You can have your butcher do the flattening and removing of bones for you, but it's pretty simple to do at home. Alternatively, you could buy separate chicken pieces, but I'd recommend to buy them on the bone, including the breast, and with skin to keep it succulent and full of flavor.


Caramelized Chipotle Chicken
Adapted from Gourmet Magazine
Serves 4

1 whole organic, free range chicken, flattened and quartered
1/4 cup extra virgin olive oil
8 large garlic cloves, thinly sliced
1 cup of ketchup
2 tbsp Dijon mustard
2 tbsp packed dark brown sugar
1/4 cup chopped canned chipotle chiles in adobo sauce
1 tbsp Worcestershire sauce
2 tbsp cider vinegar
1/2 tsp cinnamon

To make the sauce, heat the olive oil in a skillet over medium high heat and cook the garlic until it's golden brown. Remove from the pan with a slotted spoon and add the onions. Cook until they are golden brown over a medium heat for about 15 minutes.

Add the garlic and remaining ingredients (except chicken) to the onions, and season with 1 tsp salt and 1/2 tsp pepper. Simmer slowly for about 25 minutes until the sauce slightly thickens.

You can do this the day ahead and chill the sauce. I would also recommend making extra as it's one of the tastiest bbq sauces I've ever made.

I like to pat the skin of the chicken dry and salt it as it's sitting in the refrigerator so it comes out crispy and full of flavor.

Once the sauce is cooled, rub half of it over your chicken pieces and cover for 4 hours- overnight.

Instead of roasting the chicken, I wanted to cook outside (while I still can!) and my husband heated the charcoal grill with a hot pile of coals on one side of the barbecue and a few coals sprinkled on the other half to produce a nice source of indirect heat for our chicken.

Place your chicken pieces skin side up and cook for 12-15 minutes. Baste with some more of your sauce after the chicken hits the grill.

Turn the pieces over and baste again. You can put the lid on the grill to caramelize the sauce.
Cook for another 12-15 minutes until the juices run clear.

8/18/09

Mystic pizza

I am about to upset a few Chicagoans by saying that I haven't warmed to the city's signature deep dish, stuffed pizza. I know where it gets it's name...one piece and I'm stuffed. It also takes forever to actually get delivered to my doorstep, especially when I continuously seem to order it on monsoon-like evenings when the delivery man is bound to be late. This is not acceptable for greedy people who need a speedy pie.

Nope. I like my crust thin and crispy, like a pie in Rome that I had in a no-frills pizzeria in the Trastevere neighborhood. Pizza may have been invented elsewhere in Italy, but this pie was unforgettable. Straight from the wood burning oven, it's paper thin crust was adorned with a few delicious toppings, sizzling cheese, a hint of garlic and a black olive thrown into the middle as it's final crowning glory.

I know I'm on dangerous ground here as there are some seriously obsessed pizza aficionados that travel far and wide for the best slice. I'm just a self-confessed pizza lover. So much so, that I'm not going to throw my allegiance towards any pizza in particular. I've had great pies in Italy, New York and even London where a pizzeria was dangerously located across the street from my flat and right next door to my local pub, The Shakespeare. When tallying the geniousness of the Shakespeare, the fact that La Barca was just next door AND you could get your pizza delivered in the pub after several hours of boozing always pushed its score over the top.

La Barca's pizza will live long into my memory. Most of my family and friends have eaten a few slices in the pub with Martin and I. A night in the pub with pizza always made the list of things to do when we had visitors in town from all over the world.

When we moved to Chicago, our local pizzeria was high on the the "missed list" so we started making our own. Some times we make our crust from scratch, other times I buy the herb flecked ready to roll dough from Trader Joe's and some of their fat free pizza sauce which is delicious. If you don't have a good pizza sauce available, consider using some fresh pesto that you can buy at any super market in a variety of different flavors. We place the ingredients on the big chopping block and throw on some Luciano Pavarotti singing Nessun Dorma (which always makes me cry and Martin associates with the World Cup Italia 90.)

The recipe below is one that we make most regularly at home. You can mix and match any of the toppings to use up what you've got fresh in the fridge. Here's one that we made in Michigan when my cousin, Lauren, decided to make her own dough for the first time. We pulled out some fresh thyme from the market and used up all of the fresh vegetable my Aunt Michelle had lying around. Everyone got to make their own.


One thing to note about Martin and his special pizza- he was known at university as "the tuna kid." His idea of cooking is making toast. He's quite happy to keep out of my way in the kitchen (or to start hovering around at the last minute when I'm trying to get things on the table.) One night, last winter, we made this pizza together and it has since been known as his specialty.

If you're looking for a simple, no-fuss pizza dough recipe, try Nigel Slater's. I adore Nigel and own several of his books, including his charming autobiography, Toast- the story of a boy's hunger . He writes for The Observer in London and his food articles and contribution to Food Monthly is something that I miss dearly (along with all of the Sunday papers- The Times, Style Magazine- going up/going down list I miss you!)


Marty's Pizza
Makes about 8 small slices

dough for one pizza- freshly made or store bought "ready-to-roll"
1/3 cup store bought pizza sauce or pesto
handful of pepperoni
2 tbsp red chilli flakes
2 balls of buffalo mozzarella
handful of fresh basil leaves
1 cup of sliced, pitted black olives
6 small vine tomatoes, sliced lengthwise
salt and pepper
3 tbsp extra virgin olive oil
1/4 cup parmesan cheese, freshly grated
handful of cornmeal for dusting
handful of plan flour for dusting


Preheat your oven to 400F. Dust your work surface with flour and make sure your hands and rolling pin are also dusted. Roll out pizza dough to desired thickness and let it rest for about 10 -15 minutes. It does not have to be round- it's supposed to look homemade! Brush a baking pan with some of the olive oil and then dust with some cornmeal. This will make the crust extra crispy on the bottom.

When the dough is ready, brush a very thin layer of sauce (not too much - you don't want soggy!) on the dough then start with your toppings. Marty likes to go in this order: sliced tomatoes, sliced olives, pepperoni, then sprinkle over the chilli flakes to your desired spiciness and season well with salt and pepper. Drizzle with olive oil, lay over whole leaves of basil and sprinkle with some freshly parmesan cheese.

Pop this into the oven for 10 minutes- start watching it from about 8 minutes onward. You don't want to over cook it, but you also don't want the dough to be too flimsy and raw in the center.

Crack open a few beers, turn up the opera and enjoy.

8/12/09

The color of sunshine

Oh turmeric, you make everything look like sunshine. This fish curry is no exception. Not surprisingly, curry took over fish n' chips as the national British dish several years ago. I remember the first time my husband ordered a curry at a local take away restaurant. We were students in Nottingham, which should say something of the quality of the Indian restaurant. The chicken was in a fire engine red sauce and I was more than a little scared. Over time, curry grew on me until I was seriously hooked. There is a time and a place for a take-away curry, preferably a rainy Friday night paired with a few lagers and some good telly.

One of the best places to head after a long night drinking in London is Brick Lane, or in Manchester, Rusholme (aka the "Curry Mile"). Both are packed with curry houses and everyone seems to have their favorite. In London, our friends had an affinity for the one with the creepy painting of Princess Diana on the wall.

It should be said that as westerners, we have no idea what an authentic curry actually is. Chicken tikka masala may be an Englishman's idea of Indian food, but it doesn't appear anywhere in India. Unfortunately, much of the spiciness has been taken out of both Indian and Thai food for the western palate.

I'm not saying that the fish curry below is authentic, nor am I going to claim to know how to make garam masala from scratch, but the two curries below are both very special to me.

The first is a fish curry that is so gorgeously yellow that it literally makes me happy when I reach for the turmeric in the pantry. It's a fabulous dish both in the summer and in the winter. In fact, it's from Nigella's cookbook, Forever Summer, which in itself to me means that if you cook anything from it, no matter what time of year, it will feel like summer.

The second curry is probably more authentic. It's from a colleague I worked with in London, Monila Kotecha, and her family is from Gujarat in northwestern India. We were together after work at the local supermarket picking up ingredients for dinner before we went home. She headed straight to the veggies and I followed her.

If you think of nothing but grease and fat when it comes to curries, try both of these. Both are fresh and delicious. If you're going to make one for a crowd, I would choose the fish curry because it doesn't keep as well as the veggie curry (which I could eat for days on end.)


Keralan Fish Curry
Adapted from Forever Summer by Nigella Lawson
Serves 4-6

2 1/2 pounds of firm white fish (In England, I like to use haddock, but I used halibut here and it was delicious)
2 tsp turmeric
1 tbsp vegetable oil
2 medium onions, halved and cut into fine half-moons
2 long red chillies
2 inch piece of fresh ginger
pinch of ground cumin
1 can of coconut milk
1-2 tbsp concentrated tamarind
1 tbsp liquid fish stock OR half a fish stock cube*

*In Engand, you can buy Benedicta's Touch of Taste fish bouillon concentrate. You can get fish stock cubes as well, but I tried 2 cups of fresh fish stock that I bought frozen at Whole Foods. Instead of adding the hot water, I just added the 2 cups....see below.

Cut the fish into bite size pieces. In a large bowl, rub them with a little salt and 1 tsp of turmeric. Cut your onions into half moon pieces. Cut the two whole chillies, unseeded, into thin slices. Peel the ginger and slice them into thin match sticks.


Heat the oil in a large, shallow pan. Add the onions and a little salt to stop them browning. Cook for about 5 minutes until soft. Add the chillies and ginger, along with a teaspoon of the turmeric and the dash of cumin. Fry them with the onions for a few minutes.

Pour the can of coconut milk into a measuring jug and add a tablespoon of tamarind paste and the fish stock cube. Add boiling water from a kettle to measure 4 cups total. If you're using 2 cups of fish stock, warm it up in a saucepan before adding.

Add the liquid to the pan and stir to make the curry sauce. Heat until just simmering. At this point, you can taste it and add more tamarind if needed. All of this can be done well in advance if you need to. When you're ready to serve, add the fish to the hot sauce and heat for a few minutes until just cooked through, but still tender.

Serve with basmati rice (which I like to cook with a crushed cardamom pod - fish it out before you serve.)

Monila's Vegetable Curry

1 tbsp of vegetable oil
1 red pepper, cut into strips
1 onion, halved and sliced into half moons
1 clove of garlic, minced
1 red chilli, deseeded and chopped finely
1 inch of ginger minced
12 new potatoes, halved
1 cup of peas (frozen if needed)
3 handfuls of spinach
1 head of cauliflower, cut into florets
4 cups of tomato sauce or passata
1 tbsp cumin
1 tbsp ground coriander
1 tbsp garam masala
pinch of cinnamon
handful of fresh coriander (cilantro)
3 tbsp greek yogurt plus some on the table to serve.

Heat the vegetable oil in a large frying pan. Fry the chilli, onions, ginger, garlic and spices on low heat until golden brown. Add the tomato sauce and a splash of water. Bring to the simmer. Add chopped pepper and potatoes and cook for 5 minutes, then add the cauliflower and some chopped stems of the fresh coriander for an additional 5 minutes. Add the peas for 2-3 minutes then the spinach. When all the vegetables are cooked but firm, then finish with some freshly chopped coriander and a few tablespoons of greek yogurt.

If you're going to add meat to this, add 1 crushed cardamom pod, a few cloves and a little more cinnamon.

Serve with Basmati rice and/or naan bread.

8/7/09

Brown bread or dead

In cockney rhyming slang, "brown bread" is synonymous with the word "dead".  It's one of many phrases that my Mancunian husband adopted when he moved south to London.  Let me assure you that this ice cream is not for the dead.  If putting whole wheat bread into ice cream sounds odd, don't be fooled.  The little crumbs of bread make the most delicious chunks of goodness that are similar to praline.  

Ice cream is the one dessert I could not live without.  I am definitely not a sweet tooth, so I'll always pick a home made ice cream off a menu instead of something sickly and sweet.  This recipe is quite creamy- in fact the whipped cream combined with the vanilla custard not only makes the job easy, it also freezes quickly.  I could have easily made this in the late morning and served it with dinner.  

I first had brown bread ice cream in England several years ago, and it's origin dates back to the 19th century- possibly Irish or English.  It can be made with whole wheat bread or Irish soda bread.  I think I'll try the soda bread next time as it really is a bread I adore.  There's nothing better with soup than a nice slice of soda bread with plenty of butter.

This recipe is simple, especially because you don't need an ice cream maker.  I used fresh whole wheat bread here rather than letting it go stale.  I found they made the chunks perfectly chewy on the inside and crunchy on the outside.


Brown Bread Ice Cream with Berries
Adapted from Bon Appetit
Serves 6-8

1 cup of crumbs from crustless whole wheat bread
10 tbsp sugar
3 tbsp packed dark brown sugar
2/3 cup of whole milk
1 fresh vanilla pod, split lenghtwise
2 large, organic, free range egg yolks
1 1/3 cup of chilled whipping cream
2 pints of berries- strawberries and raspberries are used here

Preheat the oven to 375F.  Line a baking sheet with buttered foil.  Scatter your bread crumbs on a baking sheet and sprinkle over 3 tbsp regular sugar and 3 tbsp of dark brown sugar.  Bake for about 10 minutes, until the crumbs become slightly darker.  Flip the crumbs with a spatula during cooking to avoid them sticking.  Remove from the oven and set aside to cool.  Break them into smaller chunks if needed.

In the meantime, place the whole milk in a sauce pan.  Scrape the seeds from the vanilla pod into the milk and add the pod.  Gently heat until just simmering and remove from the heat.  Let it sit and steep for about 30 minutes until cooled.

Whisk the egg yolks with 5 tbsp sugar.  Gently whisk in the vanilla milk into the mixture.  Return all to the sauce pan and stir over low heat (do not boil) until the mixture sticks to the back of a the spoon (about 5 minutes).  Strain it into a small bowl, let it cool and then refrigerate it for about an hour.  

Beat the whipping cream in a bowl until stiff peaks form then fold in the custard.  Finally, gently add the bread crumbs and combine.  Transfer into a tupperware container with a lid and freeze.  


This takes a couple of hours- I tend to freeze mine over night.  Unlike other ice creams, you don't have to go back in and whip this- just let it freeze otherwise it won't be flat and consistent when you spoon it out into bowls.

For the berries,  cut them into bite size pieces combine them with 2 tbsp of sugar about 20 minutes before you serve them.  It creates a lovely sweet juice, perfect for trickling down the side of your brown bread ice cream.


This recipe will generously serve 6.  For a fancier dinner, I like to serve this or store bought gelato in vintage demitasse espresso cups with teaspoons. 

8/2/09

Bag of sweets

Licorice is not a flavor I am usually fond of.  In a bag of sweets, I go out of my way to avoid anything dark and mysterious, but fennel is something different all together.  It's an extremely refreshing veggie for any summer supper and it's fantastic as it is, pickled or roasted.  The below salad was born out of two inspirations.  The first was a discussion about fennel over dinner with our friends, Karyn and Nick, who shared that they slice it on a mandolin and usually with nothing more than a little lemon, olive oil, salt and pepper.  To make it fancy, they serve it with a decadent dash of white truffle oil along side fresh fried perch and green beans.  They even sent a photo of their proud supper that did indeed look delicious (and jealous as I had eaten mac n' cheese for dinner that night).   

The second inspiration came from a lunch I had at The Grocery on Southport on my birthday.  I had pickled fennel in a salad that sent off another light bulb in my head.  I should mention at this point when talking about The Grocery that my husband bought me the best vanilla cupcake with butter cream icing I have ever for my birthday there and for that, I am forever grateful (to both bakers at The Grocery and Martin).  

I have never roasted beet root and this salad made me head straight to the market.  I was delighted to find some lovely fennel with the fronds still attached.  I remember being disappointed in England when the fennel sometimes came with its dark green hair chopped right off at the bulb at larger super markets.  I also picked up some golden and reddish purple beets with the most technicolor stems you can imagine.


I turned to my trusty friend, Jamie Oliver, (or in my own mind he is my trusty friend ready to pick me up on his vespa and whisk me to the market where we look for fresh ingredients together) for some fennel and beet root ideas and he didn't disappoint.  Jamie's a huge fan of making tinfoil parcels for the barbecue and I am as well (again- we have so much in common).  I just made some mussels  on the grill by making a quick white wine sauce with shallots, garlic and parsley and then threw them in a tinfoil parcel- five minutes over hot coals and they're done.  Here's another idea for fennel that I hope Karyn and Nick like:

Barbecue-steamed Fennel
Adapted from Jamie at Home by Jamie Oliver

Fold a double piece of tinfoil in half and seal up the two sides to make a little bag.  Cut a fennel bulb in half and then into slices and add these to the envelope.  Squeeze in the juice of 1/2 a lemon and leave the lemon in the bag.  Slice up 1 red chilli, a good drizzle of olive oil and then season with sea salt and freshly ground pepper.  Seal tightly and cook over medium hot coals for about 25 minutes. 
________________________

When it comes to beets, I love them pickled, but roasted fresh, you can treat them just like carrots.  You can even use the leaves early in the season chopped up used in stir-frys.  In Jamie's book above, there are some gorgeous beet recipes for steamed beets served with grilled steak and cottage cheese dressing that is to die for, and I love the roasted beets with carrots and a sizzling hot and juicy pork chop.

So here it is, my re-creation of this beautiful salad from The Grocery.  They roast their own pecans in the store and sell them- I did note they were pepper roasted with a balsamic reduction.  No matter how you roast these pecans, they are great to keep around for snacking or salad additions.

I roasted them at the same time as the beets and you need to be careful- at a high temp, they only need about 7-8 minutes. 


Roasted Beet Root Salad with Pickled Fennel
Adapted from The Grocery
Serves 2

8 beet root- 4 golden and 4 purple/red
1 cup of pecan halves
1 fennel bulb
1 small package of goats cheese 
salad greens of your choice
2 tbsp white wine vinegar
2 tbsp extra virgin olive oil
1 tbsp balsamic vinegar

Preheat your oven to 425F.  Clean and trim your beets, drying them before placing in a small roasting tin and tossing with a little olive oil, sea salt and pepper.  Cover with foil and roast for about 40 minutes.  In the mean time, empty the pecans on another baking sheet and toss with some freshly ground pepper.  I used a Malibar spice seasoning blend that turned out tasty.

Again, pop these in the oven with the beets, but be careful and watch them so they don't burn- 7-8 minutes.  Remove and let them cool.

After the beets are done, test one with a sharp knife, then let them cool and remove their skins.  You may want to use gloves for this or you will stain your hands.

Thinly slice the fennel bulb and place it in a bowl with the white wine vinegar and some of it's chopped fronds from the top of the bulb.  Let this sit for about 5 minutes.

Mix a simple vinaigrette of the extra virgin olive oil and balsamic vinegar and season well.  Take a handful of your favorite salad greens and mix with the dressing.  

Cut the beets into bite size pieces and assemble everything on a plate putting the pecans and goats cheese on the side.  This makes such a beautiful plate, even my husband loved eating it- greens and all. 

Powered By Blogger